I love bread. I think I love bread more than any other food on the planet. Offer me a piece of cake or a loaf of bread and hands down the bread is mine every time.
I also love rain. It almost never rains in Los Angeles, so when it does it’s a real treat for a displaced East Coaster, such as myself. Nothing makes me happier that having to spend the day indoors listening to the rain outside baking bread and assorted other goodies. Today was one of those days.
I should give a disclaimer. I’m really not a great baker. I can certainly follow a recipe, but I’ve never had the patience needed to measure everything out to minute ounce. It was the only “B” I ever received in culinary school and it was a struggle to get even that. I find much more joy in cooking than baking. Cooking allows me much more freedom – no need for exact measurements. I can usually just wing it and let inspiration take over. To me cooking is art. Whereas baking is science. That being said, I’ve spent years trying to perfect my challah dough. I also do a darn good sourdough. Other breads are ok, but challah is really where I shine.
This challah recipe is the perfect mixture of eggy richness with hints of honey and sometimes cinnamon if I’m feeling racy. You can really make this dough your own and add into it whatever you would like. I’ve added chocolate chips, scallions or browned onions, cheese, cinnamon-sugar, raisins, or sesame seeds. It is a very forgiving dough and can act as a blank slate for your creativity to explore.
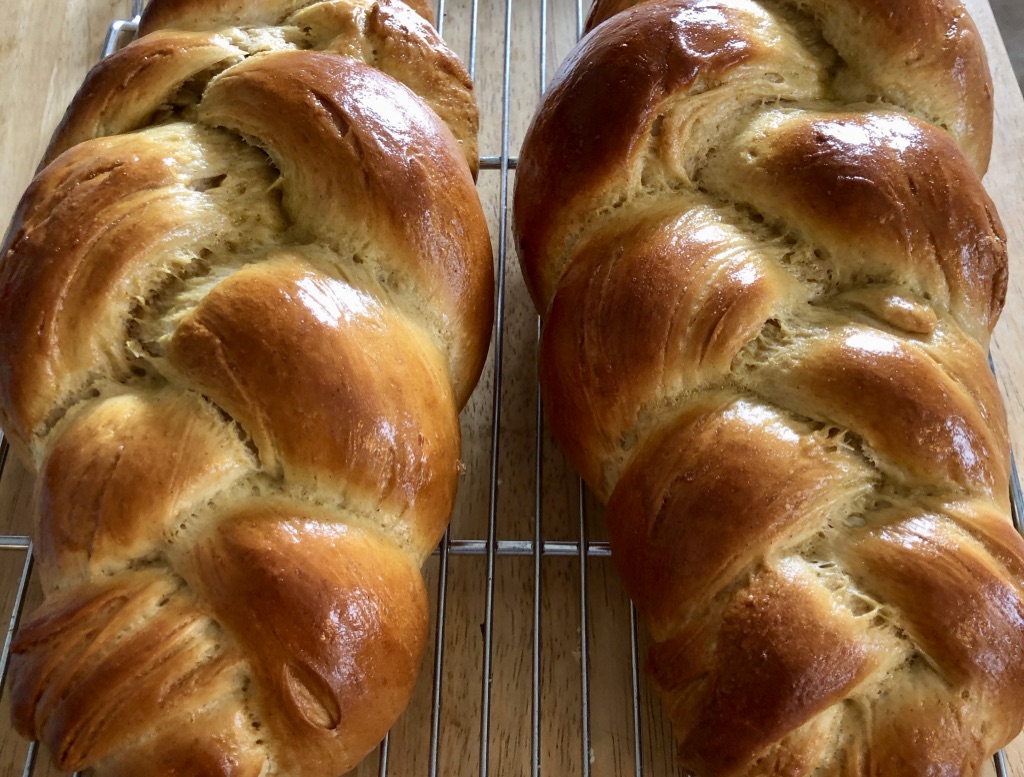
When baking challah, I always make extra loaves – especially if I am trying to get two good ones for the Jewish Sabbath. Sometimes, I also make little knots with extra dough. It’s so hard not to tear into a warm piece of bread fresh out of the oven. I hope you enjoy this recipe as much as I have over the years. It takes time and patience, but it’s always worth it.
I’ve been known to make this recipe every week in my house. The smell of the fresh challah reminds my family to have a sweet week.
Toby’s Challah
Makes two 15 oz. loaves or one 1½ lbs. loaf
Ingredients:
| 3 pkgs. | Active Dry Yeast – I Like Fleichmann’s Rapid Rise (If you are not using packets – use 2 Tbs.) |
| 3½ – 4 cups | Bread Flour or High-Gluten Flour |
| ½ cup | Warm Water |
| 4 | 3 Large Eggs + 1 For Glazing (*NOTE: Make Sure Your Eggs Are Room Temperature) |
| 4 tsp | Sugar – Spilt in Half |
| 1½ tsp | Salt |
| ¼ cup | Vegetable Oil |
| 1/3 cup | Honey |
Procedure:
- In a large bowl, whisk together the yeast, 1 tsp of sugar and 1/4 cup of the flour, then whisk in the warm water until smooth. The water should feel like a nice warm bath.
- Too hot and you can kill your yeast, not hot enough and the yeast won’t be happy. Let the yeast slurry stand uncovered for 10-ish minutes. It should begin to ferment and puff up like a sponge.In a stand mixer* with the whisk attachment, add 3 eggs, salt, oil, and honey (measure the oil first, then use the same cup for measuring the honey — the oil will coat the cup and let the honey just slip right out) and put on medium speed for 10 minutes for eggs to look creamy and also puff up.
- Once this is done, add the yeast slurry to the bowl and put on low speed to incorporate – DO NOT OVERMIX!
- Once eggs/yeast mixture is combined change to the dough hook attachment for your mixer. Add a cup of flour at a time to incorporate. You will have to feel the dough after each cup to make sure that you are not putting in too much flour. You may not use all of the flour in the recipe and that’s ok. The dough should feel silky and soft. If you are going to put in some sort of add-in, like raisins or chocolate chips, this is when you add them in. Fold them into the dough gently.
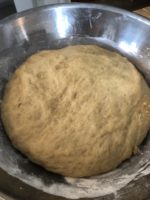
- When the dough is finished place in a clean and oiled bowl and put in a warm place covered by a towel for about 2 hours or until the dough has doubled in size or, the dough can be refrigerated (covered by plastic wrap) right after kneading, then remove from the refrigerator to finish fermenting up to 24 hours later. Let the dough ferment until it has at least doubled in bulk, about 2 hours, depending on the temperature in your kitchen. (If the dough has been refrigerated, it may take an extra 30 to 60 minutes to ferment.) (*NOTE: Sometimes if I have enough time, I let the dough rise for a second time before braiding.)
- Line one or two large baking sheets, depending on how many breads you are making, with parchment paper or oil them. Divide the dough into two 15-ounce portions for loaves, one 1 ½ pound portion for a large loaf and three small pieces for rolls (the easiest way to do this without a scale is to divide the dough into quarters and use one quarter for the rolls and the rest for the large loaf), or fourteen 2-ounce portions for rolls.
- Braid your dough very tightly – the dough will rise again and you want to retain the shape for the braid. Once braided, cover the loaves with towel. (At this point, they can be refrigerated covered by plastic wrap for up to 24 hours.) Let them proof again for about another hour or up to 3 hours if the loaves were refrigerated.
- Meanwhile, 30 minutes before baking, arrange the oven racks in the lower and upper third portions if using two baking sheets, or arrange one rack in the upper third position if using one sheet, and remove any racks above them. Preheat the oven to 325°F. If desired, you can preheat one or two baking sheets to double with the baking sheet(s) the loaves are in.
- Beat the remaining egg with the remaining tsp of sugar for glazing the breads. (NOTE: Sometimes, I use only the yolk and a little water with the sugar)
- When the loaves have tripled, brush them with the egg glaze. Let them dry for a few minutes and brush them again with the glaze.
- After the first 20 minutes of baking, brush the loaves with egg glaze for the last time and switch the loaves from front to back so that they brown evenly; if the large loaf is browning too quickly, tent it with foil.
- Bake rolls for about 15 to 20 minutes, the 15-ounce loaves for 25 to 35 minutes, or the 1 1/2-pound for 35 to 45 minutes, until very well browned.
- When the loaves are done, remove them from the oven and let cool on a rack. Bread should sound hollow when tapped on the bottom of the loaf.
*If you don’t have a stand mixed, a whisk and a large bowl will do just fine. When the directions call for a dough hook, switch to a rubber spatula or bowl scraper.